Adventures in system administration - Part 2
Step 2: Creating virtual machines
We're almost ready to start creating virtual servers with Foreman. We need to get Foreman and Libvirt to talk to each other first, which requires a little extra work. First, install the foreman-libvirt package like so:
# yum install foreman-libvirt
Restart your physical server so everything refreshes:
# reboot
Once it comes back online, you should be able to go to Foreman's web interface and set up a Libvirt compute resource. But before we do that, we need to make our Libvirt trust Foreman.
root@box# su foreman -s /bin/bash
foreman@box$ ssh-keygen
foreman@box$ ssh-copy-id [email protected]
You can leave Foreman user's SSH key in the default location and leave
the password blank if you want. When prompted, enter the root password
to copy SSH IDs. At this point, while logged in as foreman
you should be able to execute:
foreman@box$ ssh [email protected]
to get into a superuser shell. As the final test, try executing:
foreman@box$ virsh -c qemu+ssh://[email protected]/system list
If you did everything right up to here it should work without error. Now return to the Foreman web interface. Go to Infrastructure > Compute Resources and click the big blue "Create" button. Pick a cool-sounding name, and choose Libvirt from the Provider menu. For the URL, use:
qemu+ssh://[email protected]/system
As a final sanity test you can try the "Test Connection" button. If everything looks good click "Submit" and you should be all good.
More Foreman administration
There are a few more things we need to set up before we can start conjuring VMs out of thin air.
Make sure you have a Libvirt storage pool with
virsh pool-list. If you don't already have an active pool
with autostart turned on, create one like so:
# virsh pool-define-as --name default --type dir \
--target /path/of/your/choice
# virsh pool-autostart default
# virsh pool-start default
Next, we want to set up provisioning templates so we can install virtual machines unattended. Foreman comes with a few helpful example templates to get you started, so we'll just use those for now. They can always be customized later.
Go to Hosts > Provisioning Templates and find the template called "Kickstart default PXELinux." Click on it, then go to the Association tab and make sure it's associated with our CentOS 7.6 operating system (Foreman automagically knows about this OS because it knows what it's installed on). Make sure you click "Submit" once you're done.
Now go to Hosts > Operating Systems and edit CentOS 7.6. Under the Templates tab set the same template (Kickstart default PXELinux) as the PXELinux template for this operating system and hit Submit.
Repeat this process for each of the five provisioning templates needed by the OS:
- Provisioning template: Kickstart default
- Finish template: Kickstart default finish
- iPXE template: Kickstart default iPXE
- User data template: Kickstart default user data
- PXELinux template: Kickstart default PXELinux
While still editing the CentOS 7.6 operating system, switch to the Partition Table tab. Associate the included "kickstart default" partition table with this OS. Under the Installation Media tab, associate the CentOS mirror.
Foreman connects to the Libvirt API with the ruby-libvirt
gem, which we need to install.
# yum install rubygem-ruby-libvirt
Our next step is to set up a DHCP server for our virtual network, using
Foreman and Libvirt. In the end we want each of our virtual machines to
have two network interfaces: one attached to br0 which
gives them an IP address from the DHCP server running on our physical
router, in the subnet 192.168.0.0/16; and another attached to
virbr0, a purely virtual network in the subnet 10.0.0.0/16.
The virtual network will be used by Foreman for unattended provisioning
and kickstarting.
Setting up DHCP and DNS
Edit the default Libvirt network with
virsh net-edit default so that it looks like this:
<network>
  <name>default</name>
  <uuid>c9c73310-bd3c-4d04-a758-11bc905edd17</uuid>
  <forward mode='nat'/>
  <bridge name='virbr0' stp='on' delay='0'/>
  <domain name="virtnet" />
  <dns>
  </dns>
  <mac address='52:54:00:7e:be:1c'/>
  <ip address='10.0.0.1' netmask='255.255.0.0'>
    <tftp root='/var/lib/tftpboot' />
    <dhcp>
      <range start='10.0.0.2' end='10.0.254.254'/>
      <bootp file='pxelinux.0' />
    </dhcp>
  </ip>
</network>
The TFTP root directory, /var/lib/tftpboot, should have
already been made by foreman-proxy.
Next, edit /etc/libvirt/libvirtd.conf and uncomment these
lines to allow foreman-proxy to be able to connect to the
libvirt daemon.
unix_sock_group = "foreman-proxy"
unix_sock_rw_perms = "0770"
Next, cd into /etc/foreman-proxy/settings.d. There are a
few config files we need to edit.
Put these in tftp.yml:
:tftp: true
:tftproot: /var/lib/tftpboot
:tftp_servername: 10.0.0.1
In dns.yml:
:enabled: true
:use_provider: dns_libvirt
In dhcp.yml:
:enabled: true
:use_provider: dhcp_libvirt
:server: 10.0.0.1
In dns_libvirt.yml and dhcp_libvirt.yml:
:network: default
:url: qemu:///system
And in templates.yml:
:enabled: true
:template_url: https://host.example.com:8443
Add the foreman-proxy user to the libvirt group and restart the daemonso that it reloads the config files:
# gpasswd -a foreman-proxy libvirt
# systemctl restart foreman-proxy
Now if you look in Infrastructure > Smart Proxies you should be able to see that your smart proxy manages DHCP, DNS, and TFTP.
The last bit of administration we need to do it creating some subnets. I'm going to make two, because my virtual machines will each have two network interfaces. This is pretty straightforward, just go to Infrastructure > Subnets and enter the information for each one. Make sure you assign proxies for your virtual network under the Proxies tab.
Also take this opportunity to define a domain in Foreman. Under
Infrastructure > Domains create one called
virtnet
and assign it to your DNS proxy. Now you can go back and associate the
10.0.0.0/16 subnet with this domain.
Into the virtual world
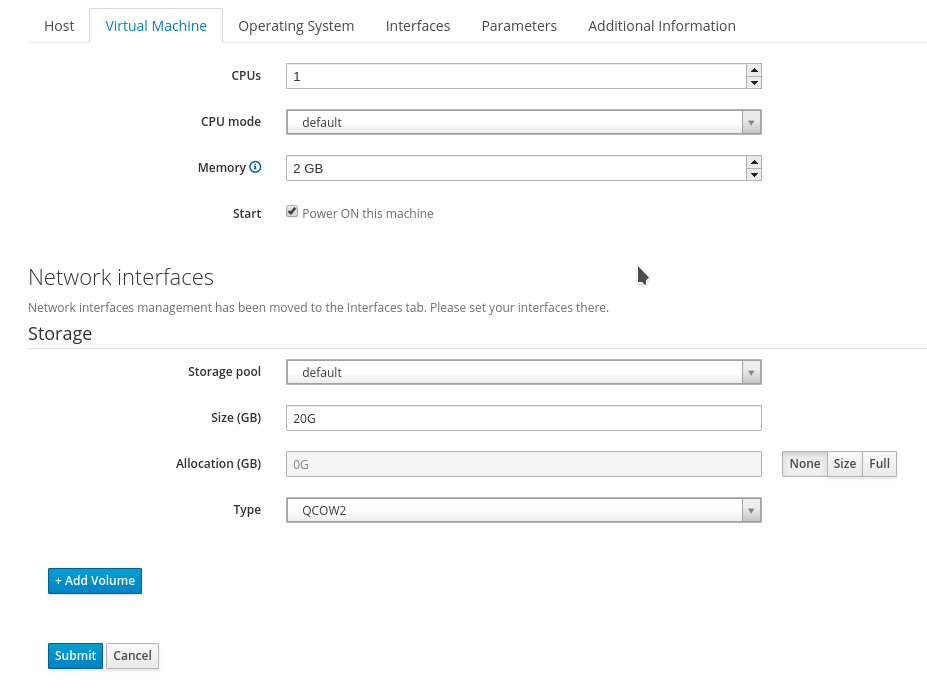
Let's go ahead and create our first virtual server. Go to Hosts > Create Host and enter a cool name. Make the Organization and Location default, and make sure you choose the Libvirt compute module you configured earlier instead of Bare Metal for what to deploy on. Configure the Virtual Machine tab however you want. I want this host to be an LDAP server, so I think I can leave it with the default 1 CPU and 2 GB of memory. Under Storage, you should see the virsh pool you created earlier. Choose how big you want your virtual hard drive to be, I picked 20 GB just to be safe. If you change the type to QCOW2 the file that represents the virtual disk will grow as it's needed, so it's not the full 20 GB unless it's totally full.
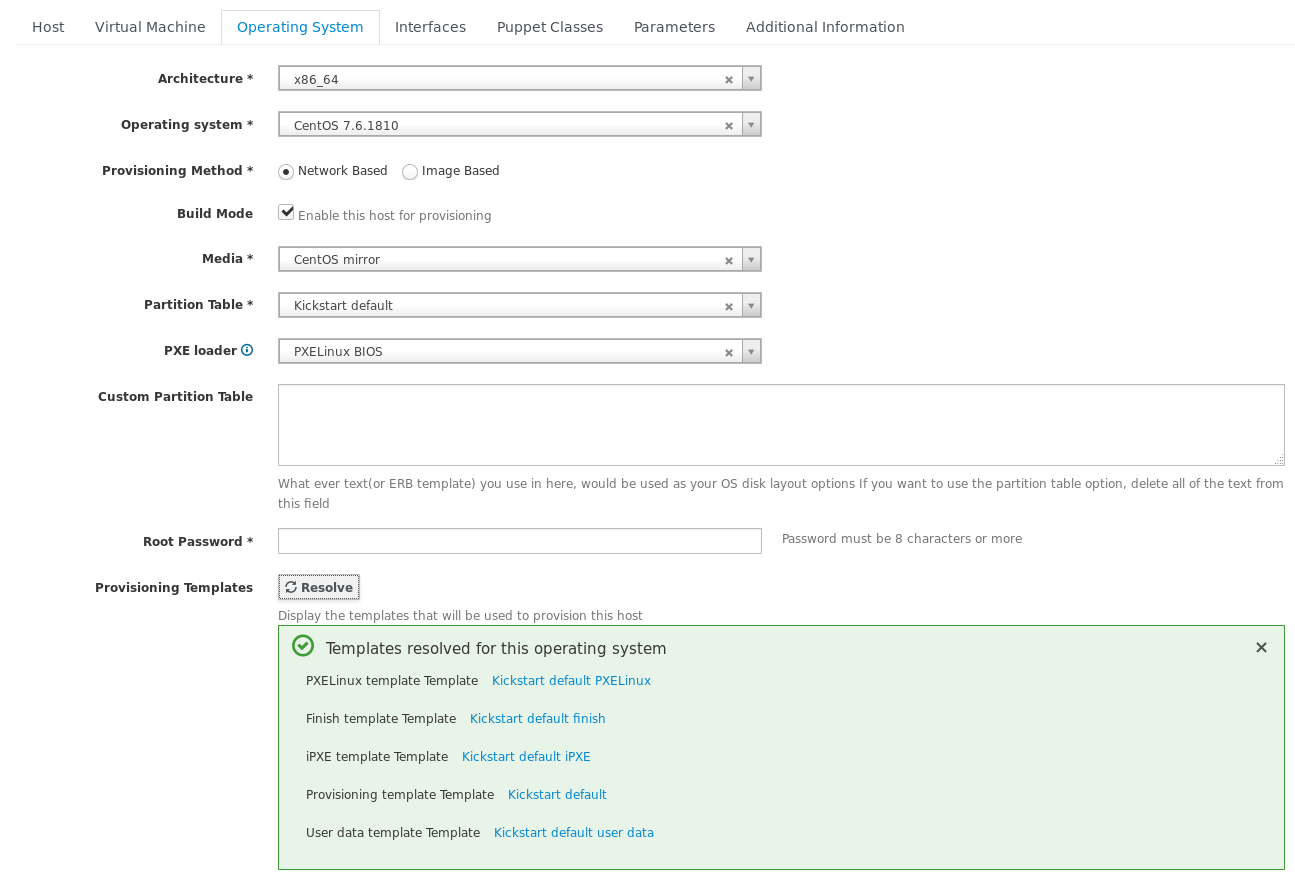
Under the Operating System tab, we're going to pick x86_64 as the architecture and CentOS 7.6.1810 as the operating system. For media choose the default CentOS mirror. Select the partition table you configured earlier, and the PXE loader will be PXELinux BIOS. Make sure you set a strong root password too. If you click "Resolve" the provisioning templates we configured earlier should show up.
Configure the interface tab how you want for your environment. For my
setup I'm giving each VM two network interfaces: one for provisioning
attached to virbr0 and Libvirt's DHCP, and a primary one
attached to br0 and my physical router's DHCP.
That's it! Go ahead and launch that VM.
Port forwarding
Note: this section only applies if you are using a Libvirt network with NAT for your VMs. I chose to use a network bridge to connect my VMs directly to my network, so this I didn't use this in my setup.
Because our VMs are behind a NAT'd virtual network, we have to port forward to make them accessible from the outside world. You should have no problem SSHing into your VM from the host they're running on, just do:
# virsh net-dhcp-leases default
to find the IP address of your VM. But this address should be unreachable from anywhere else in your network or the world. If you want to run a server, you'll need to port forward the virtual network.
For this example, I'll assume we want to forward TCP traffic on incoming port 14122 to local port 22 on a VM with the address 192.168.122.141.
Allow connections from the outside:
# iptables -I FORWARD -o virbr0 -d 192.168.122.141 -j ACCEPT
# iptables -t nat -I PREROUTING -p tcp --dport 14122 -j DNAT --to 192.168.122.141:22
And masquerade the local subnet:
# iptables -I FORWARD -o virbr0 -d 192.168.122.141 -j ACCEPT
# iptables -t nat -A POSTROUTING -s 192.168.122.0/24 -j MASQUERADE
# iptables -A FORWARD -o virbr0 -m state --state RELATED,ESTABLISHED -j ACCEPT
# iptables -A FORWARD -i virbr0 -o em1 -j ACCEPT
# iptables -A FORWARD -i virbr0 -o lo -j ACCEPT
You can now test it by trying to connect to 192.168.122.1:14122 from any other host on your physical network. It should forward you to the virtual machine's port 22.
To make these changes persist when you reboot, do the following:
# yum install iptables-services
# systemctl enable iptables
# service iptables save
If you want to port forward in the future, you should be able to do it with just these commands now that you have it set up:
# iptables -I FORWARD -o virbr0 -d 192.168.122.138 -j ACCEPT
# iptables -t nat -I PREROUTING -p tcp --dport 13822 -j DNAT --to 192.168.122.138:22
# service iptables save